Ataraxy – April 29th Build

April 29th Build V2.8

[Chrome Users: Webplayer support was recently removed from this browser. Due to this being an outdated build, I will focus on getting the up-to-date build working first.]

[unity src=”924″]

Use the full screen button ^

Submit Feedback
[contact-form-7 id=”789″ title=”Ataraxy Feedback!”]

Terrain Generation

This version introduces new life to the island generation. It improves my architecture for supporting more varied and interesting terrain.

Clusters

There are four types of cluster

  • Biome
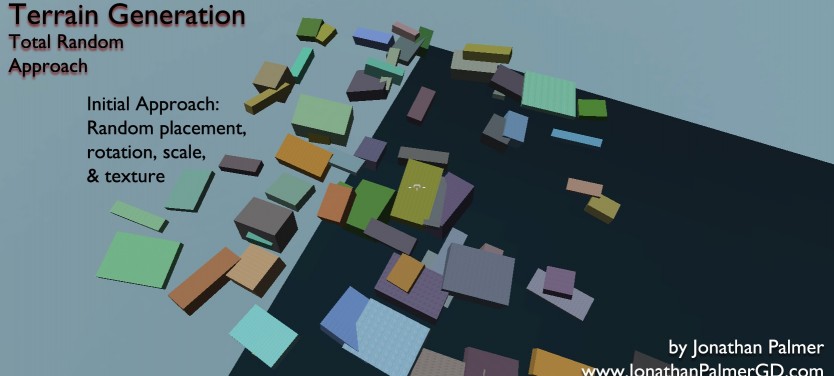
    • Features floating islands of various materials randomly placed in one of three approaches
  • Rare
    • Hand-crafted islands with a theme or purpose in mind. In later versions, they will be far less common than normal biomes.
  • Boss
    • Will contain a powerful difficult enemy the player must overcome.
    • Denoted by a large red ‘warning’ zone around the cluster.
    • [Currently, no bosses are implemented.]
  • Landmark
    • Generated next to a normal biome cluster at an uncommon frequency.
    • Serve as visual anchors and to build visual interest.
    • [Currently there are only graybox landmarks.]

Island Generation

There are now three approaches for creating islands within a biome cluster.

  • Poisson Disk Sampling
    • The standard approach in previous versions.
  • Grid
    • A grid of islands with varying subdivisions & misalignment.
    • Creates simple horizontal battle areas.
  • Layered Poisson
    • Begins with standard Poisson approach and places duplicate islands above generated ones.
    • Increases vertical interest.

Cluster Inheritance

Clusters of islands now inherit attributes from their neighbors on generation.

  • Danger Level
    • Based on neighbors, influences how many encounters are within the cluster.
    • Higher danger level results in darker random materials.
  • Island Materials
    • Will not inherit materials from neighbors with harsh danger level differences.

UPCOMING DEVELOPMENT

  • Terrain Generation Improvements
    • Non-Graybox landmarks
    • Bridges?
    • Return of tilted platform?
    • More island generation approaches
  • Pathfinding bug fixes
  • Loot system revision
  • Bosses?

Thank you for reading and playing!

Ataraxy – April 7th Build

April 7th Build V2.6

[Chrome Users: Webplayer support was recently removed from this browser. Due to this being an outdated build, I will focus on getting the up-to-date build working first.]

[unity src=”877″]

Use the full screen button ^

Submit Feedback
[contact-form-7 id=”789″ title=”Ataraxy Feedback!”]

The past week and a half have been busy and chaotic.

Early Tutorial

Several iterations into the tutorial has provided a good basis for letting players experience the game.

Trying to introduce players to the individual elements of the greater game proves difficult.

This is a better current version as I move my focus back towards environment creation.

Incoming audio

As noted in a previous Dev Blog Post, I wrote an AudioManager for Alex Lobl to use when implementing audio. The AudioManager works as expected and soon the game will feature sound effects and music!

Modifier Fine Tuning

While not visible while playing, I fixed a number of bugs occurring behind the scenes with modifiers.

I tuned some numbers to give a better feel for pacing.

Finally, I provided myself editor controls to give specific enemies specific modifiers when hand crafting context. I used this extensively in the tutorial to have better control when teaching the game concepts.

UPCOMING DEVELOPMENT

  • Terrain Generation Improvements
    • Greater vertical interest
    • Bridges?
    • Return of tilted platforms?
    • Return of landmarks?
  • The all encompassing concept of Loot Orbs is going to be divided
    • Treasure Orbs – Gain a new item!
    • Healing Orbs – Keep yourself healthy!
    • Terrain Orbs – Creating more islands!
  • Treasure Orb tool tips to display which item they contain.
  • More Transmuter’s Kit alternate effects.
  •  Modifiers!
    • Non-numeric Modifiers are a consideration, gaining new weapons, movement patterns, attacks, etc.


Thank you for reading and playing!

[Unity] Simple AudioManager

Audio Manager

Background

My Ataraxy project recently gained a member, Alex Lobl, who will be working to implement sound effects, music, the works.

In order to make his life easy, I wrote a simple Unity AudioManager which will serve a variety of ways to add sound effects as needed.

I felt it was an easy thing to share with others.

Goal

Simple calls to a singleton manager that will handle asset loading, audio source creation and removal.

Core Features

  • Use of a Dictionary that allows access to audio clips simply by providing their name
  • Loading clips upon request if not previously loaded to prevent heavy initial load times
  • Use of an audio source prefab that can be pinned at specific locations or to specific parents
  • Tracking of expired audio sources
  • Provide access to the created AudioSource for further customization
  • Vertical Remixing
  • Crossfade support for switching between single tracks
  • Only requires a single call to AudioManager.Instance.Awake() to initialize it.

How to use – Simple Case

The simplest situations of implementing audio involves playing a particular clip once so the desired audience can hear it. In this instance, the player is the desired audience and we want them to hear the entire clip. We can create the audio source as a child of player object, meaning the player will hear the entire sound effect at the same volume.

This is accomplished through the following call:

AudioManager.Instance.MakeSource(“Reflect”).Play();

The first component – AudioManager.Instance – is a static reference to the only existing AudioManager. We don’t need to do any GameObject.Find, or reference passing.

The second component – MakeSource(“Reflect”) – is a call to a particular method with a single given parameter. MakeSource will return a reference to an AudioSource. It will configure that AudioSource at a given location with a given clip. If no location or parent is given, it will default to the player because it is assumed an AudioSource should be heard. Internally, the AudioManager will check it’s dictionary for the name of the clip, if it cannot find that clip, it will load it from the Resources/Audio folder. This prevents front loading all of the audio.

The last component – Play() – This is a call to the returned AudioSource to tell it to begin playing. This is the simplest example where you will make a call when you desire the sound effect to be heard. If further customization is required, you can store the AudioSource reference returned by MakeSource() and change further parameters. AudioSource boasts a number of optional parameters that could be adjusted before calling the Play() function.

HOW TO USE – Positional Audio

There is another main case in which audio is used: when it is not immediately and perfectly audible. Imagine a rocket screaming across the sky, the explosive boom as it connects with a building in the distance, the thunderous footsteps of an approaching dinosaur. In all of these cases, we need the AudioSource to make use of Unity’s 3D volume. I programmed my AudioManager with this in mind.

Case 1 – Distance Source

CODE: AudioManager Distant Source

This is accomplished through the following call (from a rocket near within it’s explosion code):

AudioManager.Instance.MakeSourceAtPos(“NearExplosionB”, transform.position).Play();

The new components here – MakeSourceAtPos(“NearExplosionB”, transform.position) – refers to the position of the rocket when it is exploding.

We want the audio source to be located there. So when the AudioManager creates this source, it does not put it directly in the player’s ear.

The AudioManager places the source at the given position in space. This means that the volume of the audio source will change as the player moves closer to it.

The other components, such as referring to the AudioManager, the returned AudioSource and calling Play() on that AudioSource all remain the same.

CASE 2 – Moving SOURCE

CODE: AudioManager Moving Source

This is for that screaming rocket:

First, we need to hold onto the reference of the AudioSource:
public AudioSource rocketThrust;

Second, query the AudioManager for a source with the rocket’s transform as the parent parameter:

rocketThrust = AudioManager.Instance.MakeSource(“rocketBlaster”, transform.position, transform);
rocketThrust.loop = true;
rocketThrust.Play();

The MakeSource() parameters in order are:

  1. string clipName – which clip we want to assign to the AudioSource.
  2. Vector3 sourcePosition – where in world space the AudioSource should be set to.
  3. Transform parent – who the parent of the AudioSource should be, which it will move with.

By handing the rocket’s transform as the parent, the AudioSource will be assigned as a child of the rocket and will move accordingly with the rocket.

Finally, if we collide or disable our thruster, we want to stop the rocket’s thruster audio.

if (rocketThrust != null)
      rocketThrust.Stop();

There are many fancier things you can do with moving sources, such as configuring doppler levels, panning and even rotation, but I will leave those as an exercise for the reader.

How to use – Music

Music is a slightly more complicated but necessary task.

Let’s look at how to do this:

CODE: AudioManager - Playing Music


There is one missing piece:

AudioManager.Instance.tracksActive[0] = true;

This allows us to talk to the AudioManager and enable or disable certain music tracks by setting a boolean.

When a track is detected to be disabled or enabled, it will automatically fade in or fade out the volume.

Potential Improvements

Object Pooling

(Shameless borrowed from Mike Geig's Unity Object pooling tutorial)

(Shameless borrowed from Mike Geig’s Unity Object pooling tutorial)


Instead of creating and destroying audio prefabs, it would be more efficient to make use of an object pooling pattern.

  1. Create 20 Audio Source prefabs. Disable them until they are needed.
  2. When a new audio source is needed, re-initialize a previously created audio source. Return it customized as requested.
  3. Finally, when it is complete, return it to the pool of inactive audio sources.
  4. If we end up needing more than 20 audio source prefabs at once, create more.

Object pooling is a standard pattern to avoid creating and destroying frequently used objects. It isn’t always necessary to pool objects but it can give speed ups if your prefab creation is more expensive. When I upgrade this audio manager later, I will look to improve this.

Mike Geig at Unity gives a great implementation tutorial (and where I borrowed the image from.)

DELAYED PLAYING

Certain components within a game might want to create their AudioSources before they are needed. This could be used to spread out the workload of creating multiple audio sources. Currently, my AudioManager doesn’t support delayed playing. This means that if you call MakeSource() and don’t call that AudioSource’s Play() function, the AudioManager will clean up that AudioSource before it can be used.

This could be addressed by making a custom wrapper script which would hold reference to the AudioSource as well as storing a boolean if it had been played yet. The AudioManager would then only clean up sources that had been played & had finished playing.

Music Track control by Name

So above in my example for toggling music playing or not, there is a design weakness that could be improved.

AudioManager.Instance.tracksActive[0] = true;

The problem with this implementation is that you have to know which track is which. A better solution would be to allow outside scripts to ask for tracks to enable or disable by name. An additional feature would be the idea to ask the AudioManager to PlayExclusiveMusic, which would automatically disable all others.

There is plenty of room for improvement in the music section of my AudioManager and I will improve it based on the demands of the project.

Final words

After a bit more bug fixing I hope to have a UnityPackage up to share!

If you don’t want to wait, feel free to visit Ataraxy’s Github and directly grab my AudioManager. (If you do this, you should also look at my GameManager as it queries for the music to be created and controls which music is playing at a given time)

Thank you for reading!

Ataraxy – March 28th Build

March 28st Build V2.5

[Chrome Users: Webplayer support was recently removed from this browser. Due to this being an outdated build, I will focus on getting the up-to-date build working first.]

[unity src=”858″]

Use the full screen button ^

Submit Feedback
[contact-form-7 id=”789″ title=”Ataraxy Feedback!”]


A week of spring break let me get the main component of the Peril System working.

Check out last week’s post for bigger patch notes.

I’m eager to see how play-testing the new feature goes.


The Modifier UI is alongside the other enemy information.

The Modifier UI is alongside the other enemy information.

The Peril System

Enemies now gain modifiers which adjust their stats & combat prowess.

Overcoming with tough modifiers can create greater challenges.

When an enemy is slain, it grants a random modifier it has to other nearby enemies.

Modifiers are positive or negative in nature. An attentive player can dispatch enemies with negative modifiers to soften enemies up.

Gameplay Pacing

Pacing grows more important as the various systems come together. I’ve adjusted various values before doing full on balancing as many aspects are still in development.

  • Increased experience needed per player levelup
  • Reduced Loot Orb experience value
  • Enemies keep pace with the level of the player (for overall world toughening)
  • Reduced experience from Loot Orb

NEW ITEMS

Transmuter’s Kit – Primary activation transmutes internal bleeding into NOT internal bleeding.
As for the alternate activation, I don’t even know for certain. At very least, it will cost plenty of ammo and have a long cooldown.

Upcoming Development

  • Graybox Tutorial
  • Loot Orbs will be broken up into various items
    • Treasure Orbs – Gain a new item!
    • Healing Orbs – Keep yourself healthy!
    • Terrain Orbs – Creating more islands!
  • Treasure Orb tool tips to display which item they contain.
  • More Transmuter’s Kit alternate effects.
  • Modifiers!
    • Non-numeric Modifiers are a consideration, gaining new weapons, movement patterns, attacks, etc.


Thank you for reading and playing!

Ataraxy – March 21st Build

March 21st Build V2.3

[Chrome Users: Webplayer support was recently removed from this browser. Due to this being an outdated build, I will focus on getting the up-to-date build working first.]

[unity src=”838″]

Use the full screen button ^

Submit Feedback
[contact-form-7 id=”789″ title=”Ataraxy Feedback!”]


Progress has been moving along swiftly as a host of new features and items are coming together.

After a two week sprint, here are some details to report!

The revised player UI

The revised player UI

Improved UI

Throughout earlier play-tests I noticed several trends of player behavior related to the UI.

  • Failure to notice item inventory & item durability (previously in the bottom left)
  • Failure to notice enemy health & experience (previously in the top right)
  • Failure to notice own health & experience (previously top left)

So pretty much everything but the crosshair wasn’t working. This had to be fixed. The new version of the UI features a cursor-centric layout for own health & target information. The item bar was also centered. The individual items have been accented with colors to further convey the idea of item durability. The player’s XP bar was moved to the bottom of the screen in line with common conventions in MMOs.

As a final touch, the XP & HP bars for the player and enemies are now animated so they adjust over time.


New Items

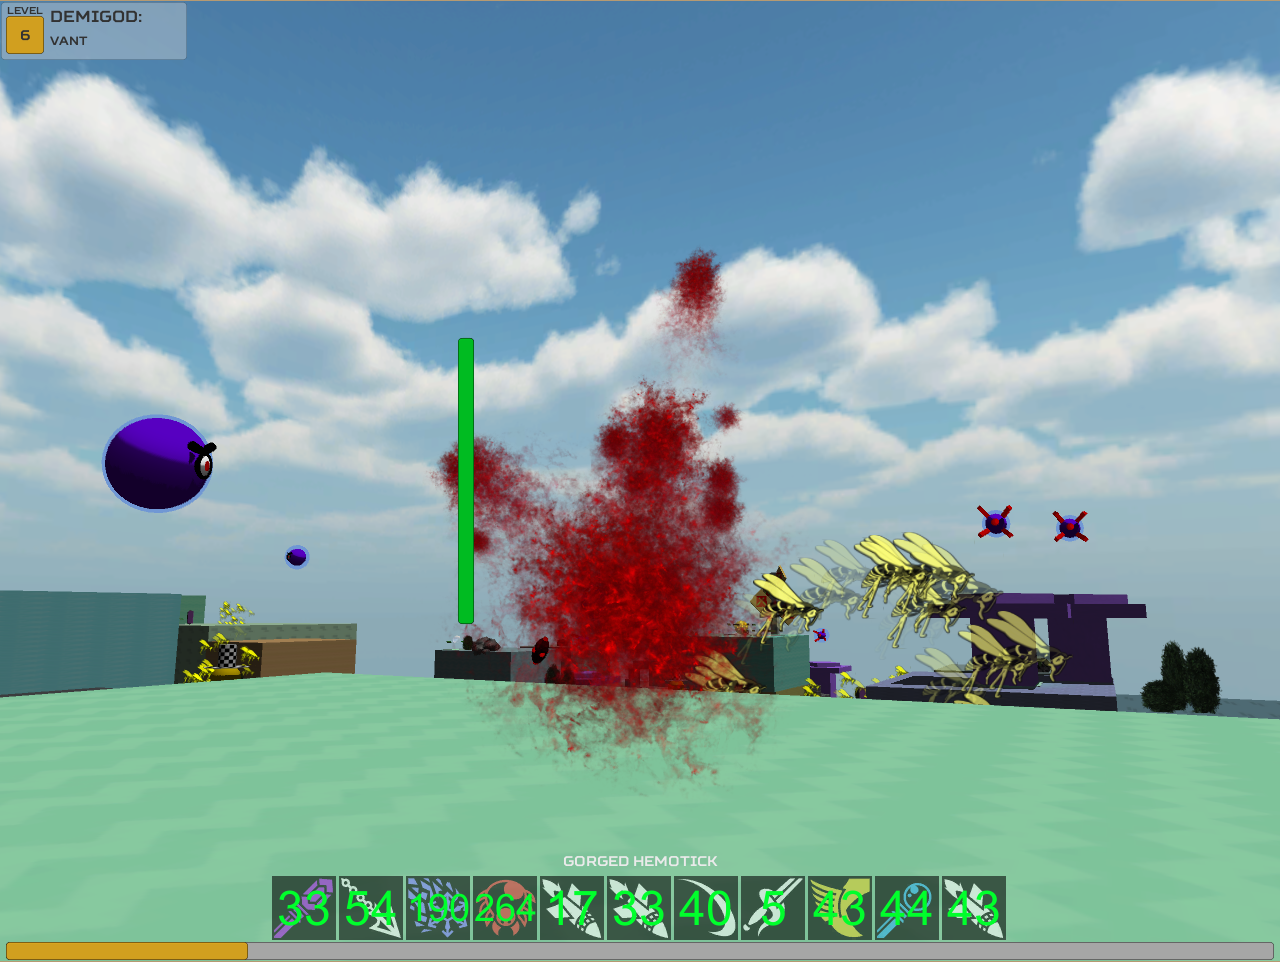
Hemotick – This deadly insect spews a short ranged bloody haze. Feed it some of your blood and it will grow in power. Be careful or it just might kill you.

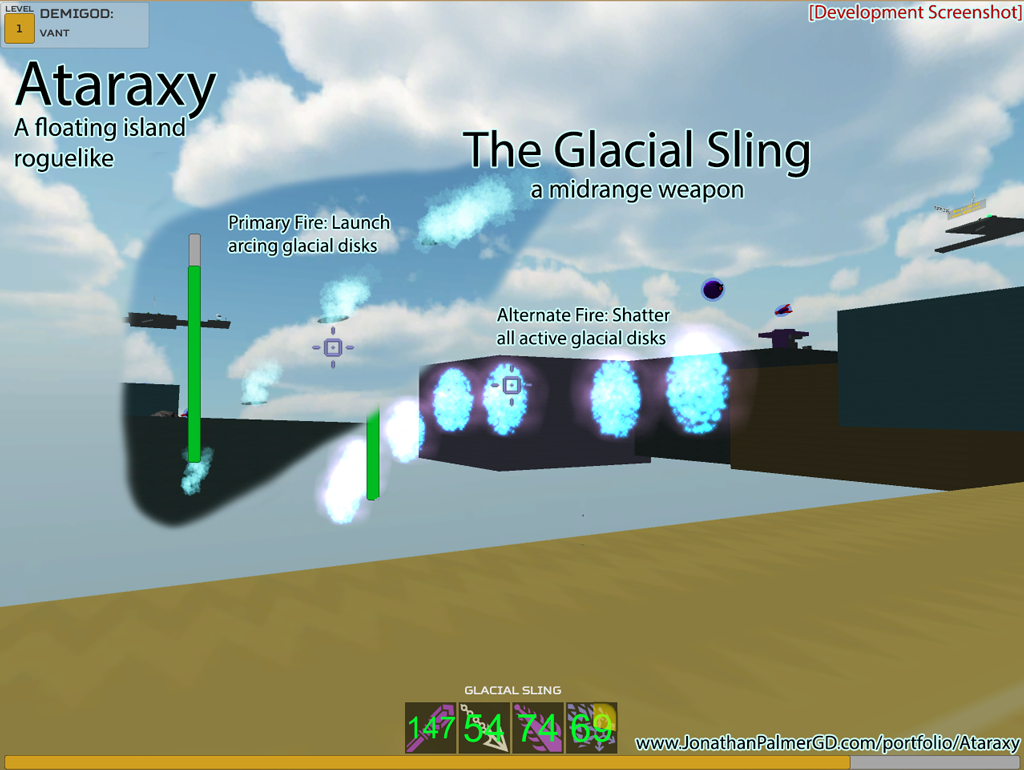
Glacial Sling – An enchanted sling for quickly launching icy arcing disks. A simple keyword explosively shatters the airborne disks.

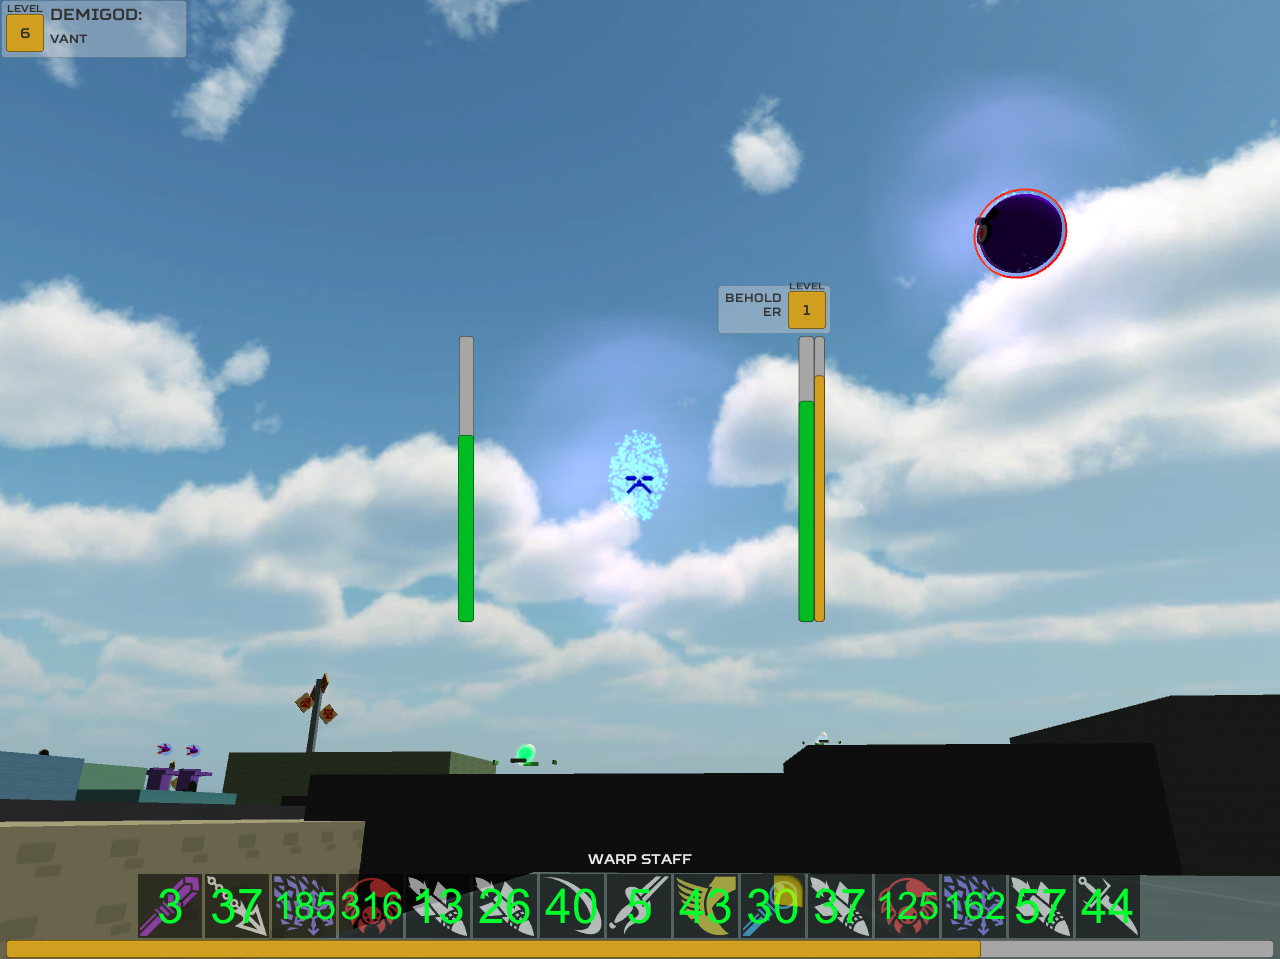
Warp Staff – Teleport yourself with an explosive arrival. Teleport your enemies to separate them from the pack. Enemies that can’t be teleported are spatially torn, suffering substantial damage.


The Towermaster: "Get over here!"

The Towermaster: “Get over here!”

New enemies

Towermaster – An observant eye with an extending clutch. Keep moving or it pull you away from whatever you were doing. A disruptive enemy that thankfully can’t deal large amounts of damage.

Nullgard – A ground navigating soldier of the Blightmind. It safely advances behind a projectile-negating tower shield. It’s sole weakness is when it raises it’s shield to strike with it’s longsword.


Meet the Team

Alex Lobl will be joining the project as an Audio Engineer. He aims to bring life to Ataraxy’s weapons, enemies and events.

Henrique Chaltein will be assisting as a Gameplay Programmer. He assisted with the initial concept for the Grappling Hook & the Towermaster. He designed and implemented the Warp Staff.


Wasp visual revisited. Left facing bees coming soon!

Wasp visual revisited. Left facing bees coming soon!

GeneraL Polish

  • Health and experience bars are now animated to improve clarity.
  • Increased the strength of the Gravity Staff & Bounding Staff to make them more viable navigation options.
  • Adjusted weapon damage values.
  • Ire Wasps have a better visual effect to convey that they are an enemy.
  • Player can no longer grapple to melee projectiles. While fun it made no logistical sense. Don’t worry, this mechanic will return later!
  • Loot tokens have received a visual overhaul to better convey them as a reward.
  • Rocket flames have been visually improved.
  • Enemy death transfer particle has been visually improved.
  • GrimKeep body texture has been changed to allow players to distinguish between the different platforms.
  • New Grappling Tower terrain feature.
  • New rocks and hedges.
  • Ground navigating entities have improved pathfinding. Not perfect, but improved.
  • Web version scene bug fixes – mouse unlocking, pausing, etc.

Upcoming Development

  • Game Audio!
  • Enemy buffs as part of the Peril System.
  • More edge case improvements to enemy pathfinding.
  • Implementing the first boss
  • Game story overview – What is the player? What is the Blightmind?
  • The Transmuter’s Kit – Mainly usable to transmute internal bleeding into NOT internal bleeding. Secondary effect is a wild card, could be helpful, could make everything worse.
  • More weapons – A spear? A whip? A short sword? Unidentified potions? Provide feedback to help me decide!

Play-testing Tidbits

As a final section, I’ll note some of the things players enjoy or were surprised by.

  • Using the Grappling hook to grab a Beholder out of the sky.
  • Rocket Jumping!
  • Grappling Hooking a Top hat.
  • How new clusters arrive on scene.
  • Grappling Hook can grab tokens.
  • “BEES, LEAVE ME ALONE!”
  • Towermasters are jerks!
  • Super speed using the Bounding Staff.
  • Moon jumps with the Gravity Staff.
  • Tophats having odd pathing moments.
  • Flinging yourself with the Grappling Hook.
  • “Dude, the Towermaster grabbed my token!”
  • Using multiple mobility items together for high mobility.


Thank you for reading and playing!

Pacing in Ataraxy – The Peril System

The Peril System

Within Ataraxy, a world of floating islands, hostile forces and an adventuring player await. The player crosses the procedurally generated terrain facing enemies who gain dangerous Enhancements with the unnatural ability to grant their enhancements to their allies.

These enhancements are new capabilities, additional power, durability or even new tactic. The player is armed with the degrading weapons they claim from the spoils of their defeated foes.

How?

Enemies track how perilous they are. They have a Peril Level which represents how many times they have gained an Enhancement.

The Peril System is the opposite of a player leveling system.

In a player leveling system, the player progresses over a large length of time. They earn rewards for individual achievements and slowly gain new capabilities, power and options for strategic play.

In the Peril System, the enemy progresses over a short duration of time while earning Enhancements for commonly occurring events.

While the player can increase in level over the course of the game, enemies generally have less longevity. To make the Peril System matter, enemies must gain peril at an accelerated rate compared to player experience gain. Ideally, enemies should become more perilous, gaining Enhancements multiple times per encounter.

Things a player typically gains experience for

  • Completing quests
  • Slaying enemies
  • Finding items
  • Talking with NPCs

Things an enemy typically gains peril from

  • Being within a certain distance of the player
  • Damaging the player
  • Being damaged by the player
  • Healing allies
  • When the player runs away

Why?

The concept of pacing exists within all variety of media; movies, books, television, and games. Pacing is the slowly increasing tension within the unfolding dramatic actions. As a story is told, the stakes get higher and the individual actions grow in scale and importance. Pacing is critical to games. Many games are designed entirely around pacing – bosses are given multiple phases, regions are unlocked, spells become more powerful.

The goal of the Peril System is twofold.

  1. To create pacing by turning up the challenge over the duration of an encounter.
  2. To create game-play variety through different enhancement enemy combinations.

The goal is that players will find themselves in novel situations that are difficult to overcome.

Inspirations

World of Warcraft Council Encounters

You seek the secrets of Ulduar? Then take them!
World of Warcraft is the pinnacle of encounter design right alongside the Legend of Zelda. Many encounters share similar mechanics while having different interpretation or side mechanics. One of my favorite style of encounters is the Council Encounter. Typically they involve several bosses each with unique abilities that must be dealt with.

The design reference here is to a specific type of Council encounter. The specific side mechanic is when one of the bosses dies, they grant an ability or abilities to the remaining bosses. This serves to forward the pacing and growing challenge of the encounter as well as compensates for the now reduced difficulty rating with one boss felled.

My goal is to implement this style of mechanic within the general enemies in procedurally generated encounters. When the player approaches a group of enemies, the first few enemies they dispatch may be easy. However, the surviving enemies will grow more perilous after being ignored and watching their companions fall. These enemies will provide a greater challenge than the initial opponents resulting in a growing sense of challenge and suitable pacing.

Additionally, the peril system gives the player valuable decision making when the player can see how enemies will grow more powerful. For instance, if a player can see the benefits an enemy will grant to it allies they may prioritize their targets differently. Finally, with a variety of Peril Enhancements a great amount of challenge and replay-ability can naturally occur in Ataraxy.

Examples of this variant of Wow Council Encounter:

Paragons of the Klaxxi

You face the Paragons!
Paragons of the Klaxxi is one of the most complicated encounters in World of Warcraft from a player’s perspective as well as a design standpoint. I’ll run through some of the core factors.

  • There are nine paragon bosses. You have to kill all of them.
  • You fight three paragons at a time.
  • When one dies, the other two heal to full and another joins the fight.
  • The one that joins the fight is random.
  • Each paragon has different abilities. Some are more dangerous than others.
  • When you kill a paragon, the other two active paragons gain damage bonuses.
  • Each dead paragon can be utilized to give a single raid member a buff.
  • Certain paragon combinations have interactions with the ability they grant or abilities they have.

The fight is loved or hated by players for its incredible complexity and demand to play re-actively as opposed to memorizing a strict strategy.

There is no strict way to play this encounter given the random order element. From one engagement to the next, your raid’s strategy has to change. There are also decision making challenges about which paragon to kill at any given time (since you can’t kill two simultaneously). If you ignore a low priority paragon for too long they could become too much to handle and dismantle your raid.

Klaxxi Paragons teach a valuable design lesson about requiring mental consideration of the mechanics at play. My Peril System intends to make use of this on a much smaller scale with enemies that grant benefits to one another passively and on death. This combined with the varied natures of the enemies means that the player makes a meaningful decision when determining which enemy to kill.

Shadows of Mordor – The Nemesis system

Your Nemesis Awaits...
Shadows of Mordor was an unexpected surprise. It held a novel approach to hostile forces in a way that inspires player engagement and results in unique player stories.

The system functioned where under certain circumstances enemy Uruk’s could gain power, notoriety and the right to be tracked in a regional power chart. These enemies would gain or lose power depending on their interaction with the player and the player’s interaction with them.

Some examples for the player interacts with the Nemesis system

  • An Uruk fills in a power a power vacuum left by a killed nemesis
  • An Uruk that kills the player becomes more powerful.
  • Nemesis’s have strengths, weaknesses, and immunities the player can learn of.
  • A nemesis that survives an encounter can grow more powerful
  • The player can put a nemesis in a challenging situation which might weaken or strengthen them.

The Nemesis system does a fantastic job at creating longevity and player stories. The contrast my Peril system has with it is that the Nemesis is a long term system, where the benefits, interactions and challenges occur over long durations of play. My Peril system focuses on the empowerment of enemies within a single combat encounter, and the decisions the player makes when confronted with growing challenges.

In short, my idea is to apply the Nemesis system on a smaller scale to individual enemies within an encounter.

Final Words

There is no single game I have come across that approaches the idea of enemy empowerment over the course of an encounter in a non-scripted manner. In World of Warcraft’s there are many small mechanics such as enrage, or fleeing, but nothing with this degree of meat and focus.

This game began as a side project but I feel this system design is worth testing, so I will be working heavily on Ataraxy to bring the Peril System to life. I will be updating this post as my idea reaches further implementation.

The current version is still in testing for transferring Enhancements.


Thank you for reading,

-Jonathan Palmer

Random Platform Generation

This is the second post in a series about Ataraxy, a roguelike platform brawler. Here I will discuss some of the approach towards my Random floating island generation.


I started with the idea of island prefabs. I want to have variety in my islands later, so I wrote to randomly select an island prefab and then place, scale, tilt, and texture it. This was a sustainable long term approach.

Clusters – The world is made up of clusters which are located near each other. Each cluster is made up of N islands. Upon creation, a cluster instantiates islands in random orientations and positions into the world.

Other Notes

Cluster Attributes
The yellow, dark yellow and red lines are debug tools I use to evaluate parts of the cluster generation.

The yellow, dark yellow and red lines are debug tools I use to evaluate parts of the cluster generation.

As many of the characteristics of islands vary, a cluster’s parameters control the islands it creates. I found it beneficial to disable certain island initialization steps – texturing, scaling or rotation as it allowed individual clusters to feel distinct from one another. This is my first approach towards the idea of Biomes.

Later parameters such as island tilt ranges, island scale ranges and island perceived size for the Poisson Disk Sampling (smaller size means many islands overlapping one another) allow for greater variation between clusters.

This particular image showcases three different ranges in island generation. The top cluster has no random texturing or coloring, so the islands all maintain a bland template appearance. The other two islands are varied and colorful. Additionally, the top cluster islands are larger, less populated and further apart compared to the bottom two. (Last note: This image was added later after I got into the enemy path-finding components of terrain generation)

Upward ORientation

This is a pair of tips for randomly scaling and rotating the islands. In early runs, some of the scale ranges resulted in islands that appeared sideways in one dimension. This occurred when an islands X or Z scale was smaller than that island’s Y scale. While this isn’t a terrible flaw, I found it beneficial to always make the Y scale the smallest of the three, if X or Z was smaller, I simply swizzled the scales (totally an excuse to use the word swizzle).

The second tip was with the ranges of rotation I allowed. I didn’t want extreme tilting of the islands to where the CharacterController slid off of them, so I randomized the rotation between a min and maximum tilt (generally the same value). This parameter varies between clusters, so some clusters will be more tumultuous than others. As for the Y rotation, I allowed that to vary between 0 and 360, being as it didn’t matter which direction the island was facing.

March Edit: I have since disabled the random rotation of islands as it disrupts the way I can generate path nodes. I plan to re-enable random island tilting after I revise my approach to generating path nodes in a way that is not disrupted by Unity’s lackluster parent-child rotation.

Terrain Features

The environment needed to be adorned with various features to be more immersive and generate player interest. When encounter environments in nature, a meadow has an occasional tree or large rock. I wanted to place ruins, altars and checkpoints that would improve the environment as well as serve game-play purposes.

My initial approach was to give each island a small chance to spawn with a terrain feature from a group of features (checkpoints, altars with tokens, cosmetic details, etc.)

All of the objects on the platforms themselves are generated in the style of terrain features.

All of the objects on the platforms themselves are generated in the style of terrain features.

Some of the terrain features in this image: Early Wanderer (the white beaked, yellow pills with a black outline), token altar (bottom right with the yellow token), ruin (on the island north of the token), a light pillar (on the far back left light brown island).

Each terrain feature is placed on top of the island within the bounds of its edges. I evaluate the size of the terrain feature so that it wouldn’t hang off the edge of an island.

A downside came with terrain features, due to the way rotations are calculated in Unity between parent and child objects, it would skew my ability to place the features atop the island. For the time being I disabled the random rotation and will revisit it later.

While the current terrain features do not greatly improve the environment, they are a step in the right direction.

When I revisit and improve them, I seek to have different terrain features for different type of clusters and islands, creating the beginning of environmental biomes.

Melee Projectiles – the Solution to Hitscan

This is the first post in a series about Ataraxy, a roguelike platform brawler.

This content is the inspiration for creation of this series, so I will give some background on the project.

I had free time over Winter break between Graduate Semesters, so I decided to throw myself at a side project – a roguelike platform brawler.

The game world is made up of procedurally generated floating islands. You encounter enemies, gaining weapons and tools. You fight enemies that level up as you fight them, which creates natural pacing (Which I’ll no doubt discuss in a future post). Weapons fall into two general categories – ranged weapons and melee weapons. This is an in-depth description.

Common Approach to Melee weapons

A number of games (Team Fortress 2, Half Life) approach melee weapons by using hitscan – performing a single raycast or collision line forward. If this raycast hits an enemy, it deals damage or applies some other effect. This is usually the way games calculate instant velocity bullets. The difference between instant velocity bullet weapons and melee hitscan weapons is the latter usually has a short max distance before it stops checking.

This is not an ideal approach for a number of reasons. Consider a virtual axe, which has a shaft and a blade. If you were to swing the axe in TF2, you only have a boolean outcome for hitting or missing. This doesn’t allow you to consider if the player hit with the axe, the shaft or missed entirely.

I wanted a better approach than this.

I took a page out of Realm of the Mad God’s book. In that game, all of the enemies fire swaths of projectiles. Their implementation for melee weapons was a short-ranged projectile like a sword, dagger or club.

[embedyt]https://www.youtube.com/watch?v=9eIv1lk5Yzk[/embedyt]

Note the short range of this player’s attacks.

I mirrored this approach and I created a short-lived melee projectile, which I’ll call a slash.

I knew a slash would need a few points to render with. I have ‘firing points’ from around the player for different weapon starting positions – rocket launcher goes on the shoulder, machine gun goes at the waist, sword slashes are sideways, etc.

An in-game view of a sword slash. Simple but attractive when combined with a fade-out effect.

An in-game view of a sword slash. Simple but attractive when combined with a fade-out effect.

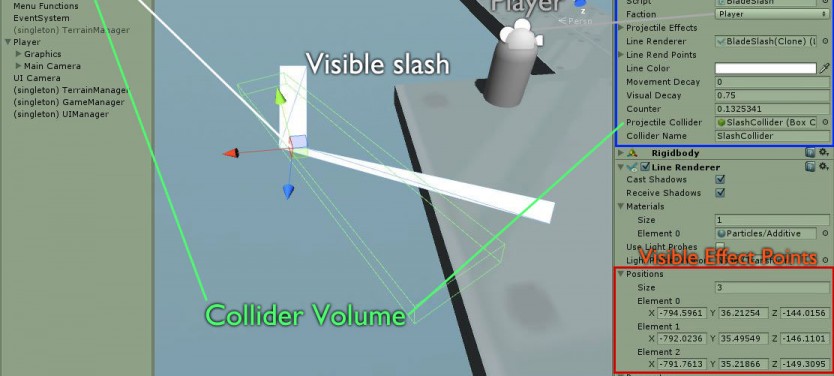
I created a box collider trigger volume (a standard way of handling  projectiles in Unity). I gave it a non-gravity affected rigidbody and a decent amount of drag so it wouldn’t travel very far.

Orienting the Collider

I oriented the box collider with the slash’s end points by using the two end points and the forward direction of the slash to find the up vector.

Within my Weapon base class, I have a method for setting up a melee projectile. It currently looks like this:

CODE: Setup Melee Projectile Parameters


This is set up so child weapons could replace this method if necessary. However, I made it generic enough that I haven’t had to replace it after implementing 4 different melee weapons. In order to use a weapon, you need to call the child’s UseWeapon function. This takes in target and fire point information. Each individual weapon’s version of UseWeapon handles differently and will until I can generalize further. Inside of the melee weapons, they configure the linePoints, lineWidth and specialVelocity if necessary while passing along certain information like the direction the projectile will move in.

A view of the editor showing a capture blade slash. Note how the slash is tilted slightly, this is based upon the two end points.

A view of the editor showing a capture blade slash. Note how the slash is tilted slightly, this is based upon the two end points.

In order to orient the Collider upwards, first we take the cross product of the two ends of our weapon strike. This gives us the direction of what is perpendicular to our line.

We then use Unity’s transform.LookAt() method to rotate the collider to orient it in the direction we’re firing. We use the the perpendicular direction to state what the projectile should consider to be ‘Up’. This results in tilting the collider to match the tilt of the two end points.

There is a final call to a method for Adjusting the projectile’s collider position. This usually means slightly moving the collider forward or backward to match the particular weapon’s visual component.

What is even better about the use of a special method for orienting the collider is that it could be overloaded in subclass weapons without changing SetMeleeProjectile.

CODE: Excerpt from Weapon.cs


Lastly, I set the alpha on the slash’s line renderer to fade over time (which aligns with the destruction of the melee projectile)

Closing Words

Alternatives

There are a great number of ways to solve this issue.

A common enough approach is the idea of a continuous hitscan, performing multiple hitscan checks to determine how long the target is hit and in what regions.

Multiple mini-projectiles can be used to see if an enemy is hit by different phases of a sword swing.

A rotational multi-projectile could model the different ways an enemy could be hit by a swinging blade (with a lower damage handle and a grazing tip)

These different approaches are usually fairly expensive and require deeper implementations.

Pros and Cons

The result of my current solution is a single projectile instantiation, box collider trigger, tag checks, a bit of vector math for rotation and finally rigidbody calculations. This approach can even be improved to suit multiple projectile creation in a particular formation as well as shape changing projectiles.


Thank you for reading, happy implementing!